
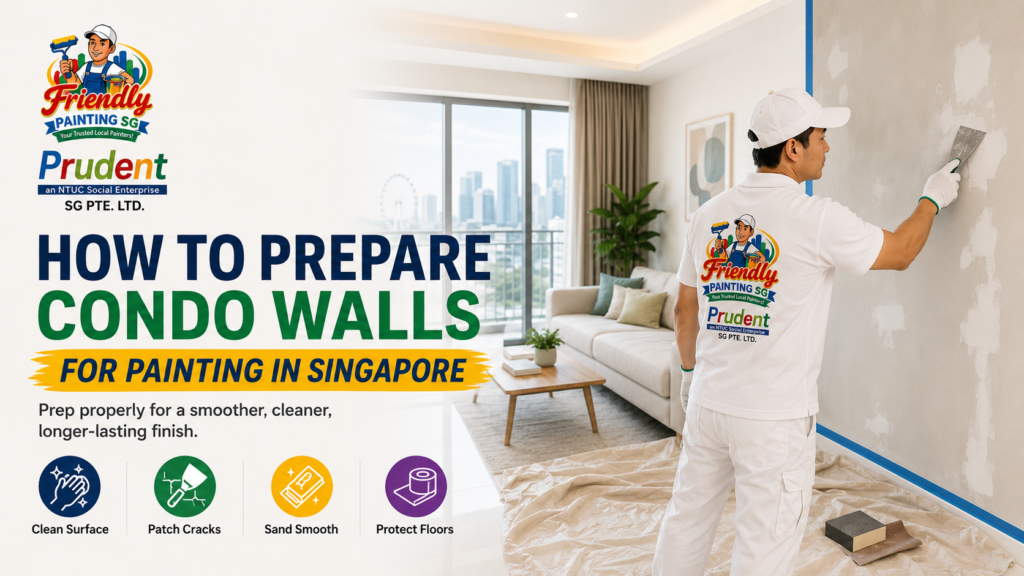
How to prepare condo walls for painting comes down to getting the surface clean, dry, stable, smooth, and properly sealed before the first finish coat goes on. In practice, that means inspecting for moisture and mould, removing loose paint, repairing cracks and holes, cleaning grease and dust, sanding uneven areas, and deciding whether a primer or sealer is necessary.
Skipping these steps can leave a freshly painted condo with visible patches, peeling edges, uneven sheen, recurring cracks, or mould returning through the new finish.
That risk deserves particular attention in Singapore. The Meteorological Service Singapore reports an annual mean relative humidity of about 82%, with humidity often exceeding 90% in the early morning and reaching 100% during prolonged rain. Moisture therefore needs to be treated as a wall-condition issue—not simply painted over.
The objective is straightforward: solve the surface problem first, then apply paint to a wall that is actually ready to receive it.
What Should a Condo Wall Look Like Before Painting?
A wall does not need to look perfect before preparation begins. It needs to become suitable for coating by the time preparation is complete.
Ideally, the finished surface should be:
- Dry
- Firm rather than powdery
- Free from loose or peeling paint
- Free from active mould
- Clean of dust, grease, wax, and residue
- Smooth enough for the chosen paint finish
- Repaired where cracks or holes are visible
- Properly primed or sealed where the substrate requires it
Dulux Singapore similarly advises that surfaces should be clean and dry, with defective or poorly adhering material removed. Its wall-preparation guidance also recommends filling small holes and hairline cracks, cleaning the wall, sanding it, and using an appropriate sealer where surfaces remain powdery or show alkaline problems.
That is why surface preparation should be viewed as a condition-based process, not a fixed sequence where every condo wall receives exactly the same treatment.
Start by Inspecting the Wall, Not by Opening the Paint Tin
Before moving furniture or buying primer, inspect each wall in good light.
Run your hand lightly across the surface and look at it from different angles.
The goal is to identify what kind of wall you are dealing with.
Look for Paint Failure
Check whether the existing coating is:
- Peeling
- Flaking
- Blistering
- Cracking
- Powdering
- Poorly bonded
A sound existing coating may only need cleaning and light abrasion before repainting.
A defective coating needs more work.
Painting directly over loose paint simply transfers the adhesion problem to the new coating.
Look for Physical Damage
Condo interiors commonly accumulate:
- Nail holes
- Screw holes
- Furniture dents
- Hairline cracks
- Damaged corners
- Previous patching marks
- Uneven plaster
These defects become more obvious after repainting if they are not corrected first—particularly under stronger side lighting or higher-sheen finishes.
Look for Moisture Symptoms
Pay close attention to:
- Mould
- Dark staining
- Damp patches
- Bubbling paint
- Repeated peeling
- Water marks
- Musty odour
A moisture-related defect requires a different response from a simple nail hole.
Painting should not become a way of hiding evidence of an unresolved leak or condensation problem.
Why Singapore Humidity Changes the Preparation Process
Singapore’s climate makes moisture assessment especially relevant.
Mean annual relative humidity is around 82%, and the Meteorological Service notes that relative humidity can reach 100% during prolonged rain.
High indoor humidity does not automatically mean every condo wall will develop mould. However, moisture can become concentrated where there is poor airflow, condensation, leakage, or a cold surface.
NEA guidance identifies water leaks, condensation on cold surfaces, and moisture penetration through walls, floors, or ceilings as possible causes of excessive indoor humidity and recommends identifying and correcting the moisture source.
That creates an important rule for condo repainting:
If a wall is damp because of an active moisture source, fix the moisture issue before treating painting as the solution.
Otherwise, the new paint may simply hide the symptom temporarily.
Deal With Mould Before Repainting
Visible mould should not be covered with ordinary wall paint and forgotten.
Dulux Singapore recommends treating visible mould with an appropriate mould-killing or fungicidal product and allowing the surface to dry before coating.
But surface treatment is only part of the job.
If mould keeps appearing in the same corner, investigate why.
Possible contributors can include:
- Condensation
- Poor ventilation
- Water leakage
- Furniture positioned tightly against a wall
- Damp substrate
- Moisture entering from an adjacent space
In a condo bedroom, for example, a wardrobe pushed almost directly against an external-facing wall may reduce air movement behind it. Cleaning and repainting may improve the appearance, but the conditions that encouraged mould should also be addressed.
Where mould is extensive, recurring, or associated with significant dampness, professional assessment is more appropriate than repeatedly painting the same area.
Clear and Protect the Condo Before Surface Work Begins
Wall preparation produces dust and debris before it produces a beautiful finish.
That matters in condos because rooms may contain built-in carpentry, upholstered furniture, televisions, curtains, air-conditioning units, decorative lighting, and finished flooring within a relatively compact area.
Dulux recommends removing pictures and ornaments, moving furniture out of the room where possible—or toward the centre where it cannot be removed—and protecting furniture and floors before painting.
You should also remove or protect:
- Curtains
- Blinds
- Loose shelves
- Decorative objects
- Fragile items
- Electronics
- Rugs
Electrical faceplates may be removed safely where appropriate or carefully masked.
Do not simply paint around loose objects if moving them provides proper wall access. Better access usually means cleaner cutting-in, more complete sanding, and easier defect detection.
Clean the Walls Before Repairing or Painting
A wall can look clean while still carrying a layer of dust, skin oils, cooking residue, aerosol products, or household grime.
Paint adheres to the surface beneath it. If that surface is contaminated, even high-quality paint cannot compensate indefinitely.
Dulux Singapore recommends removing dust first and washing surfaces with a diluted detergent solution, then rinsing away residue and allowing the wall to dry fully. It specifically notes that kitchen walls may require stronger cleaning because of grease.
Living Rooms and Bedrooms
These walls may mainly carry:
- Dust
- Cobwebs
- Finger marks
- Scuffing
A proper dust-down and appropriate cleaning may be enough.
Kitchens
Kitchen walls can collect airborne cooking oils and grease.
Painting directly over greasy areas can create adhesion problems or uneven finish.
Cleaning therefore becomes much more important around food-preparation zones.
Areas Near Air-Conditioning Units
Look closely for:
- Condensation marks
- Staining
- Dust deposits
- Previous water trails
Do not assume a dark mark is simply dirt if there is evidence of recurring water.
Remove Loose or Failing Paint
Not every old coating needs to be stripped completely.
If the existing paint is sound and firmly bonded, it may provide a suitable base after preparation.
The problem is paint that is already failing.
Loose edges should be removed until the remaining coating is stable.
Dulux recommends removing defective or poorly adhering material and rubbing down previously painted surfaces with suitable abrasive paper before dusting them off.
The objective is not to create an enormous bare patch unnecessarily.
It is to prevent the new coating from depending on an old layer that is already separating from the wall.
Watch the Transition Edge
Where loose paint has been removed, a raised edge can remain between the bare patch and surrounding paint.
If that edge is simply painted over, it may remain visible.
Feathering and smoothing the transition helps the repair disappear into the surrounding wall.
Repair Hairline Cracks and Small Holes Properly
Small cracks and holes are common preparation items.
Dulux Singapore’s wall-preparation guidance recommends filling small holes and hairline cracks before painting.
But there is an important difference between a minor cosmetic crack and a recurring structural or movement-related crack.
Minor Surface Defects
Small nail holes, shallow dents, and stable hairline cracks can often be repaired using the appropriate wall filler or patching material.
Once the material has cured, it should be sanded smooth enough that the repair does not form a visible ridge.
Repeated or Wider Cracks
A crack deserves more attention if it:
- Keeps reopening
- Is getting wider
- Runs through several areas
- Appears with water staining
- Is associated with loose plaster
- Forms around a recurring movement point
Simply filling and painting may provide only a temporary cosmetic result.
Friendly Painting SG already offers a dedicated wall crack repair and plastering service for cases that require more than minor surface patching.
That service page should remain the primary commercial destination for substantial repair intent; this article should remain focused on preparing condo walls before painting.
Do Not Ignore Previous Patch Repairs
Older walls may already contain filler from earlier painting work.
Look at repaired areas from the side rather than only straight on.
You may notice:
- Raised patches
- Depressions
- Visible filler edges
- Different texture
- Uneven sheen
These defects can become more noticeable after repainting.
A patch that feels smooth to the hand can still cast a shadow under daylight from a nearby window.
In compact Singapore condos with large windows, sliding doors, cove lighting, or track lights, low-angle light can expose wall irregularities particularly clearly.
Preparation should therefore be judged under the lighting conditions the room will actually use.
Sand the Wall for Smoothness and Adhesion
Sanding has two separate purposes.
It can smooth repaired areas, and it can also provide a better surface for subsequent coatings where the existing finish is too glossy or uneven.
Dulux Singapore recommends lightly sanding walls with medium- or fine-grade abrasive paper and removing the dust afterward. Its guidance also notes that a shiny existing surface may need light sanding before a matt repaint.
Sanding Repairs
A filler patch should blend into the surrounding wall rather than create a new bump.
Run your hand over the area after sanding.
If you can easily feel the edge, there is a good chance it will remain visible after painting.
Sanding Existing Paint
The purpose is usually not to grind away every layer of sound paint.
Light abrasion can reduce excessive gloss and improve intercoat adhesion where appropriate.
Remove the Dust
Sanding and then painting over the resulting dust defeats part of the purpose.
Vacuum or wipe the surface using a suitable method, then allow it to become fully ready for coating.
Be Careful With Sanding Dust
Paint preparation can create airborne dust.
Manufacturer guidance warns that sanding old paint films may generate hazardous dust or fumes and recommends appropriate ventilation and protective measures; Dulux notes that wet sanding or flatting may be preferable where suitable.
If the age or composition of an old coating is unknown, avoid assuming the dust is harmless.
Professional handling becomes more appropriate where extensive removal is required.
Does Every Condo Wall Need Primer?
No.
A primer or sealer should solve a specific surface problem or meet the requirements of the selected coating system.
Applying primer to every previously painted wall simply because “primer is always better” can waste time and material.
However, primer or sealer may be particularly useful when the wall includes:
- Bare repaired patches
- New plaster or masonry
- Powdery surfaces
- Uneven porosity
- Strong previous colour
- Staining that requires a compatible blocking system
- A substrate requiring improved adhesion
- Alkaline surface conditions
Dulux Singapore recommends an appropriate sealer where surfaces remain powdery or experience alkali problems after preparation.
Spot Priming vs Full Priming
If only small areas have been repaired, spot priming may be adequate depending on the coating system.
If the entire wall is problematic or the substrate requires sealing, a full primer/sealer coat may be justified.
The exact product should be compatible with the substrate and finish paint.
Do not choose primer solely by brand name; choose it for the wall condition it is designed to address.
Dark-to-Light Repainting Needs Extra Planning
Changing a wall from beige to slightly warmer beige is not the same as changing navy blue to warm white.
A strong colour change may require:
- Better coverage planning
- Suitable primer or undercoat
- Additional finish coats
- Careful patching
Dulux notes that actual coverage depends on surface condition and that stronger colour changes may require more coating.
This matters in condos because feature walls are common.
If an old dark feature wall is being returned to a neutral colour, preparation and base-coat decisions may have more influence on the final finish than the homeowner expects.
Previously Wallpapered Walls Need Different Preparation
Removing wallpaper is not the end of wallpaper preparation.
Adhesive may remain on the wall.
Dulux Singapore advises using an appropriate wallpaper remover and warns that remaining glue can later discolour paint.
After wallpaper removal, the wall should therefore be assessed for:
- Adhesive residue
- Torn surface paper
- Gouges
- Uneven filler
- Damp areas
- Previous coating failure
Do not assume that once the decorative sheet is gone, the wall is immediately ready for emulsion paint.
Higher-Sheen Paint Makes Poor Preparation Easier to See
Paint finish influences how forgiving the wall will be.
Matt finishes reflect less light and may visually soften minor imperfections.
Higher-sheen finishes reflect more light and can reveal:
- Filler patches
- Sanding lines
- Uneven plaster
- Roller texture
- Dents
Friendly Painting SG’s existing condo colour guide also notes that more reflective finishes can make wall irregularities and poor sanding more visible.
This means the surface-preparation standard should reflect the intended finish.
If the homeowner wants a more reflective coating, the wall may require more careful levelling and sanding than a low-sheen bedroom wall.
Check the Wall Again Before Painting
After cleaning, repairs, sanding, and any required primer, inspect the wall one more time.
Do not rely only on standing directly in front of it.
Look from the side with natural or artificial light passing across the surface.
You are looking for:
- Unfilled pinholes
- Visible filler edges
- Sanding scratches
- Dust
- Peeling edges
- Dampness
- Uneven primer
- Missed cracks
A few minutes of inspection can prevent several coats of paint from locking a visible defect into the finished wall.
A Practical Readiness Test
Before the topcoat begins, ask:
Is it dry?
There should be no unresolved dampness.
Is it clean?
There should be no sanding dust, grease, or loose debris.
Is it stable?
Old paint should not be peeling or powdering.
Is it smooth enough?
Repairs should suit the intended paint finish.
Is it sealed where necessary?
Bare, powdery, highly porous, or problematic areas should have the appropriate treatment.
If one answer is no, the wall is probably not ready.
What Condo Owners Can Prepare Themselves
A homeowner can make the painting process much easier before painters arrive.
You can remove pictures, fragile objects, loose décor, and small furniture. Curtains and blinds can also be removed where practical. Dulux Singapore recommends clearing or centralising furniture and protecting remaining items before painters begin.
You can also point out wall problems in advance.
Tell the painter if you already know about:
- A leak that was recently repaired
- Recurring mould
- A crack that has reopened before
- Wallpaper beneath existing paint
- A dark feature wall being covered
- Previous patch repairs
- Areas with water staining
This information helps distinguish routine painting from more substantial wall preparation.
When Wall Preparation Should Be Left to a Professional
DIY preparation is reasonable for small, uncomplicated defects.
Professional help becomes more useful when the wall has extensive peeling, recurring cracks, significant mould, widespread powdering, substantial plaster damage, suspected moisture ingress, or a large amount of sanding and levelling.
The issue is not simply skill.
A professional preparation decision asks why the wall failed before deciding what material to apply next.
For example:
- A hole needs filling.
- A damp patch needs a moisture diagnosis.
- Peeling paint needs an adhesion diagnosis.
- Recurring mould needs both treatment and moisture-control thinking.
- A reopening crack needs more than cosmetic filler.
Treating all five situations with filler and paint would be the wrong approach.
How Preparation Fits Into a Professional Condo Painting Project
Friendly Painting SG’s current condo painting service lists surface preparation, minor crack filling, furniture and floor protection, wall and ceiling painting, and final touch-ups as part of its condo painting workflow.
That is the correct relationship between preparation and painting.
Preparation is not an optional add-on after the quote.
It determines what the finish coat has to work with.
A typical professional workflow is:
inspection → protection → cleaning → defect repair → sanding → primer/sealer where required → paint application → final inspection
The amount of time spent at each stage depends on the actual wall condition.
A recently painted condo in good condition may require relatively light preparation.
An older unit with cracks, mould, adhesive residue, peeling paint, or multiple historic repairs may require substantially more work before any finish coat is worthwhile.
Common Mistakes When Preparing Condo Walls
Painting Over Mould
This may hide the stain temporarily but does not address contamination or the moisture conditions behind it.
Filling a Damp Crack
Filler is not a solution to active water ingress.
Skipping Cleaning
Dust and grease interfere with the surface the new coating needs to bond to.
Sanding but Leaving Dust Behind
A smooth dusty wall is still not a properly prepared wall.
Assuming Every Wall Needs the Same Primer
Primer choice should follow the substrate and defect.
Using Paint to Hide Uneven Plaster
Paint adds colour and finish; it is not a substitute for proper levelling.
Ignoring Side Lighting
A wall can look flat from the front and visibly uneven once daylight or track lighting crosses it.
Final Thoughts
Learning how to prepare condo walls for painting is less about memorising a checklist and more about understanding what the wall needs before a new coating can perform properly.
A sound wall may only need cleaning and light sanding.
A repaired wall may need filler, levelling, and spot priming.
A powdery wall may need a compatible sealer.
A wall with recurring mould needs the moisture condition addressed.
A wall with peeling paint needs the unstable coating removed rather than buried.
And a recurring crack may need proper repair before repainting makes sense.
For Singapore condos, moisture deserves particular attention because the country’s mean annual relative humidity is around 82%. That does not make paint failure inevitable, but it makes drying, ventilation, mould, condensation, and moisture diagnosis more important parts of surface preparation.
The best final check is simple:
clean → dry → stable → repaired → smooth → properly sealed where needed.
Once those conditions are satisfied, paint has a much better foundation for an even, durable finish.
For condo owners who would rather have the wall condition assessed together with the painting work, Friendly Painting SG provides dedicated condominium painting that includes surface preparation, protection, minor crack filling, painting, and final touch-ups
Frequently Asked Questions
How do you prepare condo walls for painting?
Inspect the wall first, then clean it, remove loose paint, treat mould or moisture problems, repair small holes and cracks, sand uneven or glossy areas, remove dust, and apply an appropriate primer or sealer where required. The wall should be clean, dry, stable, and smooth before the finish coat begins.
Do I need to wash condo walls before painting?
Usually, yes, where dust, grease, dirt, or residue is present. Dulux Singapore recommends removing dust, cleaning with an appropriate detergent solution, rinsing residue, and allowing the surface to dry fully before painting.
Should I sand walls before repainting a condo?
Sanding can help smooth filler and uneven areas and can improve adhesion on certain existing finishes. Dulux recommends light sanding with suitable abrasive paper during wall preparation.
Do I need primer before painting condo walls?
Not every previously painted wall requires full priming. Primer or sealer becomes more relevant for bare repairs, new surfaces, powdery walls, uneven porosity, strong colour changes, or other substrate-specific problems.
Can I paint over hairline cracks?
Minor stable hairline cracks should generally be filled and smoothed before painting rather than simply covered. If a crack repeatedly reappears, becomes wider, or is associated with moisture, further investigation may be needed.
Can I paint over mould after cleaning it?
The affected area should be properly treated and allowed to dry, but recurring mould also requires attention to the moisture or ventilation conditions that are encouraging it. Simply covering untreated mould with paint is poor preparation.
Why does paint peel even after repainting?
Peeling can occur when the underlying surface is unstable, damp, contaminated, powdery, or poorly prepared. New paint cannot permanently correct a failing substrate merely by covering it.
How long should a wall dry before painting?
There is no single drying time for every wall because humidity, cleaning method, filler, primer, substrate, and product instructions differ. The important requirement is that the wall and any repair materials are sufficiently dry according to the product system before the next coating stage.
Should I remove all old paint before repainting?
Not necessarily. Sound, well-adhered paint can often remain after cleaning and suitable preparation. Loose, flaking, or poorly adhering paint should be removed until a stable surface remains.
Can a painting contractor repair condo wall cracks before painting?
Minor crack filling is commonly part of surface preparation, while larger or recurring defects may require dedicated plastering or crack repair. Friendly Painting SG lists both surface preparation within its condo painting service and a separate wall crack repair and plastering service.