
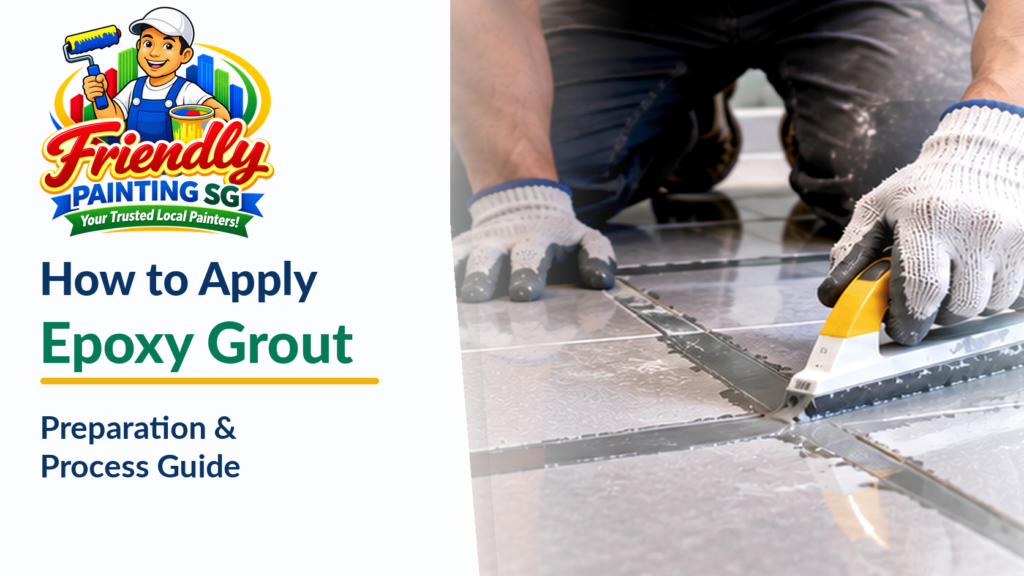
Apply epoxy grout to prepared joints, pack them with a suitable float and clean the tiles within the product’s specified cleanup window.
Learning how to apply epoxy grout starts before you open the components. Confirm tile compatibility, organise the cleaning equipment and read the mixing instructions first. Once mixing begins, the product’s working period becomes part of your schedule.
For a Singapore home, also plan access to the tiled area. A shower floor, kitchen backsplash and occupied living room create different practical constraints.
This guide from Friendly Painting SG explains the application sequence and the checks that support it. For the broader explanation of materials and suitable uses, read our epoxy grout guide for Singapore homes.
What Should You Check Before Starting?
Confirm the Actual Product
Read the technical data sheet and installation instructions for the grout you intend to use. Check that the documents match the product and its components.
Identify its approved surfaces, joint dimensions, mixing method, application conditions and cleaning stages.
Keep those instructions accessible throughout the work. A general guide helps you understand the sequence; the chosen product provides the specific quantities and timings.
Check the container labels and condition before opening them. Use the correct components together, and follow the storage and shelf-life requirements.
Assess the Tile and Existing Joints
Look for loose tiles, damaged edges, recurring cracks and moisture concerns. Arrange an assessment of those issues before deciding that new joint filler provides the appropriate repair.
For new tiling, confirm that the adhesive has reached the stage its instructions require before grouting. For regrouting, establish how much existing material the selected product requires you to remove.
Keep movement joints and relevant transitions within their separate joint details. Technical instructions distinguish flexible-sealant locations from ordinary rigid-grout joints.
For wet-room concerns, our epoxy grouting guide for toilet tiles explains bathroom locations, drainage observations and assessment questions.
Plan a Trial Area
Use a suitable trial area when the tile finish or product instructions call for one.
Check the proposed application and cleanup method together. A test should help you assess the joint appearance and the tile surface after cleaning.
Pay particular attention to textured finishes, porous stone and delicate surfaces. Keep the product requirements in view rather than assuming that a successful result on one tile proves suitability for another.
Check the Working Conditions
Check the conditions around the actual surface and materials, rather than relying only on the outdoor weather report. Product guidance explains that temperature can affect working time and readiness for use. Follow the stated temperature limits and material-conditioning requirements.
For example, a shaded indoor wall and a surface beside a sunlit window may present different working conditions. Identify those differences before organising the application.
Keep the selected product within its instructions throughout the work. If the site cannot meet a requirement, resolve that condition before mixing.
Also check the practical setup: lighting should let you see residue, tools should remain accessible and the work area should allow the cleanup sequence. A well-organised setup connects the documented application method with the conditions in your home.
Which Tools and Epoxy Grouting Material Do You Need?
Prepare the selected epoxy grouting material and the equipment before mixing. Organise supplies so that filling and cleaning can follow the required sequence without interruptions.
| Equipment or material | Purpose |
|---|---|
| Compatible grout components | Form the joint filler according to the product instructions |
| Clean mixing container | Hold the components during preparation |
| Specified mixing tool | Blend the material using the required method |
| Suitable epoxy-grout float | Pack joints and remove excess material |
| Approved pads and sponges | Perform the product’s cleanup stages |
| Clean water and specified cleaning additives | Support the approved washing method |
| Surface protection | Protect nearby fittings and finishes |
| Product-appropriate protective equipment | Control exposure during handling and application |
| Timer and accessible instructions | Track the batch and required stages |
Choose cleaning pads and tools that suit the tile finish. Do not assume that an abrasive pad appropriate for one surface suits polished stone or a delicate decorative tile.
Keep spare cleaning supplies available. Plan where you will rinse or replace equipment without crossing fresh joints.
Also establish how you will collect waste and clean tools. Follow the product’s safety and disposal instructions, including its guidance for contaminated cleaning liquid.
A useful preparation exercise is to walk through the work before opening the containers. Identify where you will mix, where each tool will sit and how you will reach the first cleanup stage.
Is Epoxy Grout Toxic? Understand the Handling Requirements
The risk depends on the product, its components and the exposure. Some uncured epoxy components can irritate skin or cause allergic skin reactions. Review the safety data sheet for every component you will handle.
Use the specified gloves, eye protection and other protective equipment. Glove material matters; select protection appropriate for the chemicals rather than relying on any household glove.
Provide the ventilation and exposure controls the instructions require. Odour alone cannot tell you whether the conditions are safe.
Keep the working area separate from normal household activity. Handle any powder components according to their own safety information.
If a spill or exposure occurs, follow the relevant component’s first-aid instructions. Keep the product details available for anyone who needs them.
Curing changes the material, but a surface that feels firm does not establish every curing or return-to-use milestone. Follow the documented requirements for the installation.
How to Apply Epoxy Grout Step by Step
Step 1: Prepare and Check the Joints
Remove the existing material or adhesive contamination to the extent the chosen grout requires. Select a preparation method that suits the joint width, tile edges and surrounding installation.
Clear dust and loose debris. Inspect the joints for remaining contamination, blocked sections or insufficient space for the new material.
Bring the joints to the moisture condition the product specifies. If cleaning involved water, account for the necessary preparation period before mixing.
Check the corners and boundaries of the work area. Identify any joint that needs a separate sealant detail, and keep it outside the ordinary grout-filling operation.
Preparation should leave a suitable joint for the material, rather than simply improve the appearance of its top edge.
For example, a narrow gap may look clear from above while adhesive still occupies much of its depth. Inspect the actual available space against the product requirements before proceeding.
Before moving on: confirm the joint condition, surface compatibility and protection of adjacent finishes.
Step 2: Mix the Components as Instructed
Open and combine the components in the sequence the product specifies. Use the stated tool and mixing method, and aim for the uniform consistency the instructions describe.
Some systems contain separate resin, hardener and filler components; others package the filler differently. Do not transfer one product’s mixing sequence to another.
Follow the instructions for complete units or permitted partial batches. Some products require full-unit mixing. Where a product allows a partial batch, use its specified measuring method and proportions.
Avoid estimating component quantities by eye. Likewise, do not add water, solvent or another ingredient to improve workability unless the product explicitly permits it.
Official tile-grout instructions differ in component arrangements and batch rules, which makes the product-specific method essential.
Record when mixing starts and follow the stated working period. Keep the planned application area manageable within that period.
Before moving on: confirm the blend and the available application time.
Step 3: Pack the Grout into the Joints
Use a suitable grout float to work the material into the prepared joints.
For products that specify diagonal float passes, move across the joint lines while applying enough pressure to pack the available space. Work through a manageable area systematically rather than scattering material across several unfinished sections.
Check that the material fills the joints instead of bridging their tops. Give accessible edges and intersections the same attention as the central area.
Use the float to remove excess from the tile faces as the instructions direct. Keep the tool clean enough to maintain control over the application.
Your working area should reflect your filling and cleanup capacity. A section that takes too long to clean creates a different problem from a section that merely takes longer to spread.
For a backsplash, also organise access around sockets, fittings and decorative edges before mixing. Those details can interrupt an otherwise straightforward sequence.
Before moving on: inspect the filled joints and remove the specified excess material.
Step 4: Complete the Initial Cleanup
Start the first cleaning stage at the point the product instructions specify. Use the approved water, additives, pads and sponges.
Follow the stated method for loosening surface residue and wiping it away. Maintain the joint finish while cleaning the tile faces.
Rinse or replace equipment as needed. Change contaminated cleaning water according to the application instructions so the cleaning process does not spread residue back across the surface.
Check textured areas and tile edges carefully. Resin can remain in surface recesses even when the surrounding tile looks clean.
Product application guides emphasise controlled filling, excess removal and fresh-residue cleanup. The suitable tools and exact washing sequence depend on the grout and tile finish.
Keep the cleaning materials close enough to use without walking through fresh work.
Before moving on: review the tile faces and joint finish under useful lighting.
Step 5: Perform Any Further Wash and Inspection
Complete any additional cleaning stage the product requires within its stated schedule.
Use fresh, appropriate cleaning equipment. Review the surface from different angles so that lighting does not conceal a film or residue.
Check the joints for gaps, disturbed sections or an inconsistent finish. Follow the product instructions for any permitted correction while the material remains within the appropriate stage.
Inspect the surrounding fittings and protected surfaces too. The work should include the cleanup locations you agreed before starting.
If hardened residue remains, identify the grout and tile before choosing a treatment. An aggressive tool or chemical can introduce a surface problem of its own.
Do not improvise a correction simply because the area looks almost finished. Establish whether the product permits the proposed method at that stage.
Before moving on: confirm the completed cleanup and record any issue that needs further attention.
Step 6: Protect the Work and Follow Curing Instructions
Keep the completed area within the conditions the product requires.
Prevent access or activities that would disturb the fresh joints. Follow the separate instructions for foot traffic, water exposure and cleaning.
Working time, initial firmness and readiness for use describe different stages. A product may also specify a later point for its full resistance to stains or chemicals.
Use the documented milestones for the actual product and site conditions. Do not apply a waiting period from a different installation.
Keep the product name, application date and return-to-use instructions with your household records.
If an installer completes the work, ask for those details at handover. Explain any bathroom or access constraint before scheduling so the plan accounts for the restrictions.
Before returning to normal use: confirm which activities the instructions permit.
Use a Simple Batch Record
Write down the mixing start, the section you intend to complete and the cleaning stages required for that batch. Keep the record beside the product instructions.
A simple note might identify “backsplash beside the basin” as the current section. That location matters more than a general reminder to finish the wall.
Before starting another batch, review the previous section. Confirm that its required cleaning stages remain on schedule and that fresh tools and supplies are available.
Imagine finishing the filling quickly, then discovering that your spare sponge sits outside the accessible work area. The interruption affects the cleanup plan even though the spreading went smoothly. Organising those details in advance prevents avoidable delays.
If the work involves more than one person, agree on who handles mixing, filling, cleaning and timing. Everyone should follow the same product instructions.
Keep the batch record with your handover notes so later enquiries include the actual application history.
What Application Mistakes Should You Avoid?
A useful inspection considers the process as well as the finished appearance.
| Application mistake | What to do instead |
|---|---|
| Starting without the correct instructions | Confirm the product documents and component labels first |
| Guessing component proportions | Follow the specified full-unit or permitted partial-batch method |
| Mixing before arranging cleaning supplies | Complete the work-area setup before opening components |
| Covering too much area at once | Match the section to the product’s working and cleaning schedule |
| Leaving excess on tile faces | Complete excess removal and washing as instructed |
| Using unsuitable cleaning tools | Check compatibility with the tile finish |
| Returning to wet use too early | Follow the documented water-exposure milestone |
Use this table to identify the step that needs attention. For example, a cloudy surface after application calls for product and residue assessment, while a gap in a joint calls for inspection of the filling and finishing.
Avoid treating every problem as a reason to add more material. Identify the condition and confirm a suitable correction.
Photographs can support that conversation. Include an overall view, close-ups and the product details, especially if someone else will assess the completed work.
How to Do Epoxy Grouting in a Furnished Home
Plan the household around the work sequence.
Clear the agreed area and move loose items that would obstruct access or collect residue. Confirm how you will protect nearby furniture, fittings and finishes.
For floors, establish a route that allows the work and cleanup without crossing fresh joints. For wall areas, arrange stable access to the affected surface before handling the grout.
Consider the timing of other renovation tasks. Tell the installer about painting, plumbing or fitting work that involves the same area.
If the home has one bathroom, confirm the restrictions on toilet access, showering and floor washing separately. Permission to enter the room does not necessarily permit every activity.
Keep the household informed about the agreed boundaries and schedule. Place the return-to-use instructions somewhere accessible.
This planning helps the application method fit the home’s actual use. It also reduces interruptions after the team has begun working with a mixed batch.
When Should You Arrange Professional Application?
Consider professional assessment when the work involves sensitive tiles, restricted joints, extensive removal or an uncertain existing installation.
A large tiled area may also need a coordinated filling and cleanup plan. Describe its layout and access constraints when making the enquiry.
If you notice loose tiles, a recurring crack or a wet-room concern, include those observations before requesting application alone. The assessment should establish what the joint work can address.
To discuss a suitable project with Friendly Painting SG, visit its epoxy grouting services in Singapore page. Send photographs, tile information, affected locations and any previous repair history, then request a project-specific quotation.
Confirm the proposed product, preparation scope, surface protection, cleanup and handover instructions.
Understanding how to apply epoxy grout helps you assess that proposal: the preparation, mixing, filling, cleanup and curing stages should connect into a clear work plan.
Frequently Asked Questions
1. What Is the Correct Sequence for Applying Epoxy Grout?
Prepare suitable joints, organise the tools, mix the specified components, pack the joints and perform the required cleanup stages. Then protect the work and follow the curing instructions. Use the actual product documents for proportions, timing and conditions throughout that sequence.
2. Can I Apply New Grout over Existing Material?
Only proceed with a preparation method that meets the selected product’s requirements. Assess the existing material and available joint space first. A thin new surface layer does not automatically provide a suitable installation. Confirm the removal depth and joint condition before mixing.
3. Can I Add Water to Make the Mix Easier to Spread?
Do not add water to the grout mix unless its instructions explicitly permit it. Water for a prescribed cleaning stage serves a different purpose. Follow the component proportions and preparation method for the product instead of changing the mixture to suit your preference.
4. Can I Mix Only Part of the Pack?
The answer depends on the product. Some require complete units, while others permit a partial batch using specified proportions and measurements. Read the instructions before opening components. Avoid guessing quantities or assuming that a method from another grout also applies to yours.
5. How Much Area Should I Grout Before Cleaning?
Choose a section you can fill and clean within the product’s specified schedule. Tile texture, layout and access affect that plan. Start with a manageable area after completing any required trial. Do not use a universal area size that ignores the actual conditions.
6. Why Does Epoxy Residue Remain on the Tiles?
Possible concerns include the washing schedule, cleaning method, surface texture or contaminated equipment. Confirm the grout and tile details before choosing a correction. Fresh-residue cleanup and hardened-film removal can involve different methods. Avoid assuming that stronger chemicals provide the appropriate answer.
7. Is Epoxy Grout Toxic During Application?
Some uncured components can irritate skin or cause allergic reactions. Check each component’s safety data sheet and follow its ventilation, handling and protective-equipment requirements. A product’s odour or a general “epoxy” label cannot establish the exposure controls for your installation.
8. Can I Use the Same Grout at Every Corner?
No. Movement joints and relevant transitions need appropriate joint details, often involving flexible sealant. Identify those locations before filling ordinary tile joints. Follow the installation requirements rather than using rigid grout at every boundary solely to match the surrounding appearance.
9. When Can I Walk on or Wash the Finished Area?
Follow the product’s separate instructions for traffic, water exposure and cleaning. A surface that looks dry does not confirm every curing milestone. Ask the installer for written guidance that matches the product and site conditions, especially when the household relies on that room.
10. What Should I Ask an Installer before Booking?
Request the proposed product, preparation and removal scope, tile-compatibility checks, protection method and cleanup plan. Confirm access restrictions and return-to-use guidance too. Share photographs and previous repair information so the assessment and project quotation reflect the condition of the tiled area.