
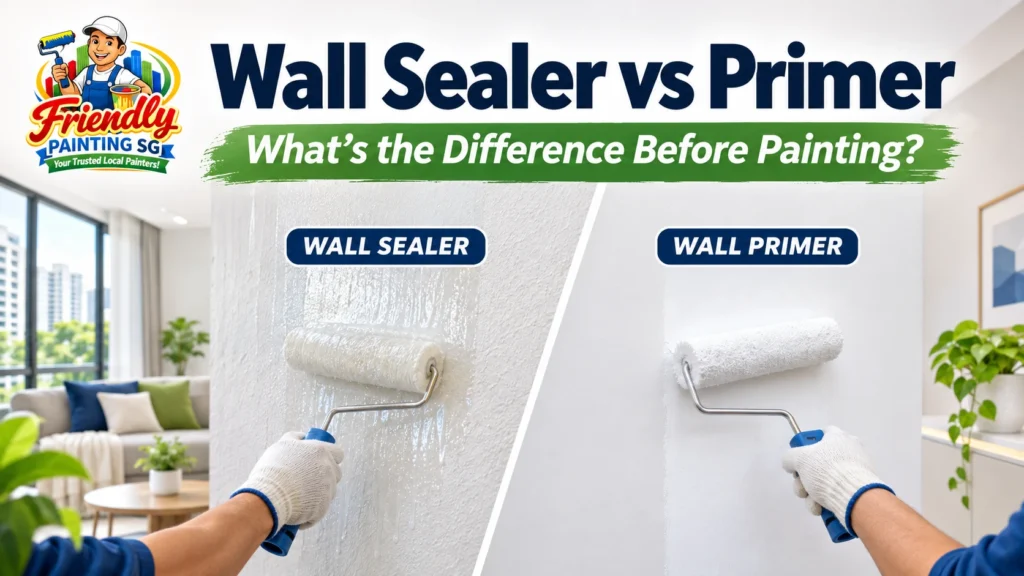
When planning to repaint your home, choosing the right paint colour is often the most exciting part. However, what happens underneath that beautiful finish is equally important. Whether you are renovating an HDB flat, refreshing a condominium, or painting a newly completed property, understanding wall sealer vs primer in Singapore can help you avoid costly painting mistakes.
Many homeowners assume that wall sealers and primers are identical. Although both products prepare surfaces before painting, they can serve different purposes depending on their formulations. A wall sealer is commonly used to control surface porosity, stabilise suitable masonry surfaces, and reduce problems caused by alkalinity. Meanwhile, a primer may improve adhesion, provide a uniform base, or help cover stains and existing colours.
Singapore’s tropical climate makes proper wall preparation especially important. High humidity, frequent rainfall, and moisture-related problems can affect the durability and appearance of painted surfaces. Moreover, different properties have different requirements. Newly plastered HDB walls may need a different preparation system from previously painted condominium interiors.
So, should you use a wall sealer, a primer, or both?
The answer depends on your wall’s condition, surface material, existing coating, and the paint you intend to apply.
This comprehensive guide explains the difference between wall sealer and primer, their advantages, suitable applications, preparation methods, and common mistakes. By the end, you will understand how to select an appropriate undercoat for your Singapore painting project.
Wall Sealer vs Primer: What Is the Main Difference?
The main difference between a wall sealer and primer lies in the specific surface problems each product is designed to address.
A wall sealer generally helps control the absorbency of porous surfaces and creates a more stable foundation for subsequent paint coats. Certain formulations also provide resistance to alkaline conditions commonly associated with cement-based surfaces.
A primer prepares a surface for painting by improving adhesion, creating a more uniform base, or providing other functions such as stain blocking.
However, these categories overlap. In fact, many painting products sold in Singapore combine the functions of a primer, sealer, and undercoat.
What Is a Wall Sealer?
A wall sealer is a preparatory coating commonly applied to masonry, plaster, cement render, and other suitable wall surfaces before the finishing paint.
Its main purpose is to improve the condition of the surface so that subsequent coatings perform properly.
Wall sealers may help:
- Reduce excessive paint absorption.
- Improve surface uniformity.
- Stabilise suitably prepared, mildly powdery surfaces.
- Reduce the influence of alkalinity on compatible finishing coats.
- Improve the adhesion of subsequent coatings.
- Reduce uneven colour or sheen caused by inconsistent absorption.
For example, newly plastered walls often absorb liquid unevenly. Without appropriate preparation, some areas may appear duller than others after painting.
Applying a suitable wall sealer can help create a more consistent base.
How Wall Sealers Work on Interior and Exterior Walls
Wall sealers work by forming or penetrating a coating within the surface, depending on their formulation.
On porous masonry, the product can reduce excessive absorption and improve the consistency of the finishing paint.
Certain specialised sealers also provide resistance to alkali-related problems.
However, the level of penetration, adhesion, and protection varies considerably between products.
Therefore, homeowners should always follow the manufacturer’s recommendations for their particular wall surface.
Common Situations Where Wall Sealer Is Needed
Wall sealers are commonly considered for:
- Newly plastered walls.
- Cement-rendered surfaces.
- Porous masonry.
- Previously painted walls with residual chalkiness after preparation.
- Walls affected by alkalinity.
- Repaired surfaces with uneven absorption.
Importantly, a sealer cannot permanently repair unstable plaster or stop an active water leak.
What Is a Wall Primer?
A wall primer is a preparatory coating applied before the final decorative paint.
Its primary function is to create a suitable foundation for the chosen topcoat.
Depending on its formulation, primer can improve adhesion, help cover existing colours, block certain stains, or make the finishing coat appear more consistent.
For example, imagine repainting a dark blue bedroom in a light cream colour.
Without an appropriate undercoat, the darker colour may remain visible after multiple coats of paint.
A suitable primer or undercoat can improve hiding and reduce the number of finishing coats required.
How Primer Improves Paint Adhesion
Paint adhesion refers to how securely a coating bonds to the surface underneath.
A suitable primer promotes adhesion by creating an intermediate coating compatible with both the prepared substrate and the final paint.
However, primers are not universal.
A product designed for metal may not be appropriate for plaster, while a masonry primer may not work properly on glossy laminate.
Always choose a primer approved for the specific substrate.
Common Situations Where Wall Primer Is Needed
Primer may be useful when:
- Painting bare or repaired surfaces.
- Changing from dark to light colours.
- Preparing suitable smooth surfaces.
- Covering certain stains.
- Improving the uniformity of finishing paint.
- Applying paint to surfaces requiring specialised adhesion.
Can One Product Work as Both a Wall Sealer and Primer?
Yes.
Some products combine both functions into a single coating.
These are commonly marketed as primer sealers, sealer undercoats, or multipurpose surface-preparation products.
For example, Singapore paint manufacturers offer products designed to provide adhesion, alkali resistance, and improved coverage in one formulation. nipponpaint.com.sg
Nevertheless, homeowners should verify the product’s suitability for their particular wall rather than relying only on the words printed on the packaging.
Wall Sealer vs Primer Singapore: Key Differences Explained
Understanding the practical differences can help you select the correct preparation system for your property.
Wall Sealer vs Primer Comparison Table
| Comparison Factor | Wall Sealer | Wall Primer |
|---|---|---|
| Primary purpose | Controls porosity and prepares suitable wall surfaces | Promotes adhesion and prepares surfaces for finishing paint |
| Common surfaces | Plaster, cement render, masonry | Masonry and other approved substrates |
| Surface absorption | Helps reduce excessive absorption | May also control absorption |
| Paint adhesion | Improves adhesion when correctly selected | Promotes adhesion when correctly selected |
| Alkali resistance | Available in specialised formulations | Available in certain formulations |
| Stain blocking | Depends on product | Available in specialised primers |
| Colour coverage | Some formulations improve hiding | Certain primers improve hiding |
| New plastered walls | Often recommended | Suitable masonry primer-sealers may be used |
| Previously painted walls | Useful when specified for the wall condition | Useful for repairs, colour changes, or adhesion requirements |
| Main limitation | Cannot repair active water damage | Cannot compensate for poor surface preparation |
The most important consideration is not the product name alone. Instead, homeowners should evaluate the coating’s technical properties and intended application.
Which One Is Better for New Walls?
For newly plastered or cement-rendered walls, an appropriate alkali-resistant wall sealer or masonry primer-sealer is often a suitable choice.
Fresh cementitious surfaces can contain significant alkalinity. If the coating system is unsuitable, this may affect the appearance or durability of the finished paint.
However, newly completed walls must first reach the moisture and curing conditions required by the selected coating system.
Which One Is Better for Previously Painted Walls?
Previously painted walls require a different assessment.
If the existing coating is sound, clean, and compatible with the new paint, a complete primer coat may not always be necessary.
However, primer or sealer may be recommended when:
- The original paint is peeling.
- The wall has been repaired.
- Surface absorption is inconsistent.
- The existing colour is considerably darker.
- The substrate has become chalky.
Therefore, inspect the existing wall before buying additional products.
Which One Is Better for Damp Walls?
Neither ordinary wall sealer nor primer is a substitute for fixing water-related problems.
If moisture is entering through plumbing leaks, external cracks, or other defects, the source must be identified and corrected.
After the wall has dried sufficiently, a suitable coating system can be selected.
Painting over active dampness may cause blistering, peeling, staining, and repeated coating failure.
Different Types of Wall Sealers and Primers Used in Singapore
Not every sealer or primer provides the same level of protection.
Understanding the available formulations can help homeowners make informed decisions.
Water-Based Wall Sealers
Water-based wall sealers are commonly used for suitable interior masonry surfaces.
Depending on the product, advantages may include:
- Lower solvent odour.
- Convenient application.
- Water-based tool cleaning.
- Good compatibility with specified emulsion paints.
- Available low-VOC formulations.
These products are often considered for bedrooms, living rooms, and other residential interiors.
However, water-based does not automatically mean suitable for every surface.
Solvent-Based Wall Sealers
Solvent-based sealers use organic solvents as part of their formulation.
Certain products are designed for difficult masonry surfaces, including appropriately prepared chalky or alkaline substrates.
They may offer useful performance characteristics where a conventional water-based product is unsuitable.
However, they can produce stronger odours and require additional precautions.
Adequate ventilation, manufacturer-approved protective equipment, and safe handling are particularly important.
Acrylic Wall Primers
Acrylic primers are formulated using acrylic-based binders.
They are commonly available for various wall-painting applications.
Depending on the product, they may provide:
- Good adhesion.
- Surface uniformity.
- Compatibility with selected acrylic topcoats.
- Improved preparation of repaired surfaces.
Check the product specification before using an acrylic primer on cement render, plaster, or previously painted walls.
Alkali-Resistant Wall Sealers and Primers
An alkali-resistant wall sealer is particularly relevant for cement-based surfaces.
Such products are designed to reduce problems associated with alkaline substrates within the conditions specified by the manufacturer.
They are often considered when painting newly plastered walls or masonry surfaces.
However, alkali resistance does not eliminate the need for adequate curing and drying.
Stain-Blocking Primers
Stain-blocking primers are formulated to reduce the risk of certain stains showing through the finishing paint.
They may be useful for appropriately prepared surfaces affected by:
- Water-stain residues.
- Nicotine discolouration.
- Selected ink or marker stains.
- Tannin-related discolouration.
However, the primer must be specifically suitable for the stain involved.
Multi-Purpose Primer-Sealer Products
Combination products can simplify surface preparation.
A suitable multipurpose primer-sealer may provide:
- Adhesion.
- Porosity control.
- Improved hiding.
- Resistance to specified substrate conditions.
Nevertheless, no single product is guaranteed to solve every painting problem.
When Should You Use Wall Sealer Before Painting?
A wall sealer becomes useful when the condition of the surface creates problems for ordinary paint application.
Painting Newly Plastered or Cement Walls
Fresh plaster and cement render can be porous and alkaline.
Consequently, directly applying decorative paint may produce inconsistent absorption or coating problems.
A suitable masonry sealer can help prepare the surface.
Before application, confirm that the plaster has cured and dried according to the coating manufacturer’s requirements.
Preparing Porous or Powdery Wall Surfaces
Some walls develop a fine powdery layer known as chalking.
This commonly occurs when older paint coatings deteriorate.
To identify chalking, gently rub the surface with a clean, dry cloth.
If powder transfers onto the cloth, the wall may require additional preparation.
First, remove loose material through appropriate cleaning and surface preparation.
Next, determine whether the remaining substrate is sufficiently sound for a compatible sealer.
Severe chalking or crumbling surfaces may require more extensive repairs.
Painting Walls With Uneven Absorption
Patched walls often contain different materials.
For example, a repaired section may include filler surrounded by existing emulsion paint.
These surfaces may absorb paint at different rates.
As a result, the finished wall can develop visible differences in sheen or colour intensity, sometimes called flashing.
An appropriate sealer or primer can help reduce this problem.
Preparing Previously Painted Walls
A wall sealer may be recommended when an old coating has deteriorated or the underlying surface requires stabilisation.
However, applying sealer directly over loose paint is ineffective.
All unstable material should be removed first.
When Should You Use Wall Primer Before Painting?
Wall primer is particularly useful when adhesion, colour coverage, or specialised surface preparation is the main concern.
Painting Over Dark Wall Colours
Changing from dark grey to off-white can require additional preparation.
A suitable primer or undercoat may improve coverage and help create a more uniform base.
However, the number of coats depends on the product’s hiding power, the original colour, and the selected finishing paint.
Improving Adhesion on Smooth Surfaces
Some previously painted surfaces have a glossy finish.
New coatings may struggle to adhere if the surface is not properly prepared.
Depending on the coating system, cleaning, sanding, and applying a suitable bonding primer may be necessary.
Painting Repaired or Skim-Coated Walls
Repairs often create patches with different absorbency.
Therefore, spot priming or priming the complete wall may help improve consistency.
The best method depends on the size of the repaired area and the manufacturer’s recommendations.
Preparing Stained Walls
Certain stains can migrate through ordinary decorative coatings.
A specialised stain-blocking primer may be necessary before repainting.
However, the underlying cause must be addressed first, particularly when water damage is involved.
Wall Sealer vs Primer for HDB and Condo Painting in Singapore
Different residential properties require different approaches to wall preparation.
For homeowners planning a renovation, professional interior painting services in Singapore can help ensure proper wall preparation, suitable undercoat selection, and consistent paint application.
Wall Preparation for Newly Completed HDB Flats
Newly completed HDB flats may contain walls with different substrates, finishes, and levels of preparation.
Before starting an HDB painting project, inspect the wall condition carefully.
Check whether the surfaces are:
- Bare cement render.
- Plastered.
- Previously coated.
- Repaired or skim-coated.
- Affected by visible moisture.
For suitable new masonry, an alkali-resistant sealer or primer-sealer may be appropriate.
However, the final selection should follow the wall material and coating manufacturer’s specifications.
Homeowners planning a complete renovation can learn more about HDB painting services in Singapore to understand the preparation work commonly involved.
Wall Sealer or Primer for HDB Resale Flats
Resale flats may have several layers of existing paint.
In addition, previous repairs, moisture exposure, and ordinary wear can create uneven surfaces.
Before repainting, inspect:
- Existing paint adhesion.
- Visible cracks.
- Water stains.
- Chalking.
- Surface cleanliness.
- Previous wall repairs.
If the existing paint is sound, full-wall priming may not always be necessary.
However, deteriorated areas should be repaired and prepared appropriately.
Primer and Sealer Requirements for Condo Interiors
Condominium interiors may include painted plaster, feature walls, decorative coatings, and other finishing materials.
Each surface may require a different preparation method.
For example, repainting a standard emulsion-painted bedroom is different from painting over a glossy decorative coating.
Therefore, selecting the correct primer depends on the existing surface, not simply the property type.
What About Older Singapore Homes With Peeling Paint?
Peeling paint often indicates a problem beneath or within the existing coating.
Possible causes include:
- Moisture intrusion.
- Poor initial surface preparation.
- Incompatible paint systems.
- Excessive chalking.
- Unsound underlying plaster.
- Application over contaminated surfaces.
The correct solution begins with identifying the cause.
Simply covering peeling paint with sealer is unlikely to produce a durable result.
How Singapore’s Humid Climate Affects Wall Sealer and Primer Selection
Singapore’s warm, humid conditions can influence how paint dries and performs.
However, humidity alone does not automatically cause paint failure.
Problems are more likely when coatings are applied to excessively damp, contaminated, or unsuitable surfaces.
Humidity and Its Impact on Paint Adhesion
High humidity can slow evaporation and affect drying conditions.
As a result, some coatings may need additional time before another coat can be applied.
Ventilation and the specific product formulation also influence drying.
Therefore, follow the recommended conditions and recoating intervals rather than assuming every paint dries at the same speed.
Why Moisture Problems Must Be Fixed Before Painting
Consider a bedroom wall near a leaking window.
Even if the surface appears dry after wiping, moisture may remain within the wall.
Applying a primer or sealer without repairing the leak can trap the problem beneath a new coating.
Consequently, the paint may blister or peel again.
The correct approach is to:
- Identify the moisture source.
- Repair the defect.
- Allow the wall to dry adequately.
- Assess any damaged substrate.
- Apply a compatible coating system.
Can Wall Sealer or Primer Prevent Mould?
A standard wall sealer or primer cannot guarantee permanent mould prevention.
Some products contain ingredients designed to resist fungal growth on the coating.
However, mould can return when persistent moisture, condensation, and poor ventilation remain unresolved.
Therefore, effective prevention requires addressing the environmental conditions that encourage mould growth.
Choosing Products for Bathrooms, Kitchens, and Exterior Walls
Bathrooms and kitchens may experience greater moisture exposure than bedrooms.
Exterior walls also face rainfall, sunlight, and temperature changes.
Consequently, these surfaces require coating systems suitable for their exposure conditions.
For ordinary interiors, an appropriate masonry sealer and compatible emulsion paint may be sufficient.
However, persistently wet areas and exterior surfaces require more specialised consideration.
How to Apply Wall Sealer or Primer Before Painting
Correct application is essential for achieving a consistent finish.
Even a suitable product can fail when the surface is poorly prepared.
Proper surface preparation is essential for achieving a durable paint finish. For additional guidance, refer to Dulux Singapore’s guide on how to prepare walls before painting, which explains important steps such as cleaning, repairing cracks, sanding, and preparing wall surfaces.
Step 1: Inspect the Wall Condition
Begin by checking for:
- Cracks.
- Peeling paint.
- Powdery surfaces.
- Water stains.
- Mould.
- Loose plaster.
- Uneven repairs.
Understanding these problems helps determine the required preparation.
Step 2: Clean and Prepare the Surface
Remove dust, dirt, grease, and other contaminants.
Cleaning methods should suit the existing coating and substrate.
Allow washed surfaces to dry adequately before proceeding.
Step 3: Repair Cracks, Holes, and Damaged Areas
Use suitable repair materials for minor cracks and holes.
Once the repaired material has cured, sand it where appropriate to create an even surface.
However, significant structural cracks or recurring moisture damage may require specialist assessment.
Before applying sealer or primer, damaged surfaces may require professional wall crack repair and plastering services to create a stable foundation for the new paint.
Step 4: Check Moisture Levels
Before applying paint, ensure the wall meets the moisture requirements of the selected coating system.
A suitable moisture meter may help identify suspicious areas.
Nevertheless, readings must be interpreted according to the substrate and equipment used.
Step 5: Select the Right Sealer or Primer
Choose the product according to:
- Wall material.
- Surface condition.
- Existing coating.
- Interior or exterior application.
- Intended finishing paint.
- Manufacturer compatibility requirements.
Check Compatibility With the Existing Paint
Avoid assuming that all primers and topcoats work together.
Where possible, follow a complete coating system recommended by the manufacturer.
Follow the Recommended Application Method
Some products require specific rollers, brushes, dilution ratios, or preparation methods.
Always follow the product’s technical data sheet.
Step 6: Apply the Recommended Number of Coats
Many preparation products specify one coat under normal conditions.
However, certain surfaces or coating systems may require a different application.
Follow the manufacturer’s instructions instead of automatically applying additional coats.
Step 7: Allow Proper Drying and Recoating Time
Drying time varies according to the product, temperature, humidity, ventilation, and film thickness.
Therefore, avoid relying on a single universal waiting period.
A surface that feels dry to the touch may not yet be ready for recoating.
Step 8: Apply the Final Paint Coats
Once the undercoat has dried appropriately, apply the selected finishing paint.
Use the recommended application method and number of coats.
For more detailed guidance on residential repainting, explore interior painting services in Singapore.
Common Mistakes to Avoid When Using Wall Sealer or Primer
Improper surface preparation, moisture intrusion, and incompatible coatings can contribute to paint failure. Understanding why paint is peeling from walls in Singapore can help homeowners identify the underlying problem before repainting.
Skipping Surface Preparation
Applying primer over dust, grease, or loose paint may reduce adhesion.
Therefore, proper cleaning and removal of unstable coatings should always come first.
Using Primer Instead of Treating Moisture Problems
Primer cannot permanently stop an active leak.
Likewise, ordinary wall sealer should not be treated as a replacement for waterproofing or plumbing repairs.
Applying Wall Sealer Over Loose Paint
Loose paint creates an unstable foundation.
Even if the sealer adheres to the old coating, the entire layer may eventually detach.
Choosing Incompatible Painting Products
Different coating systems have different requirements.
Combining incompatible materials may cause poor adhesion, wrinkling, or other defects.
Applying Paint Before the Undercoat Dries
Premature recoating can affect film formation and coating performance.
Always follow the recommended drying and recoating intervals.
Assuming Every Wall Needs Both Products
Some surfaces require only one appropriate primer-sealer.
Others may need specialised preparation or multiple compatible coatings.
Using unnecessary products adds cost without guaranteeing better performance.
Wall Sealer vs Primer: Which Is More Cost-Effective in Singapore?
The cost-effectiveness of a wall sealer or primer depends on the condition of the surface and the requirements of the painting project.
Choosing the cheapest product is not always the most economical decision.
Factors That Affect Wall Sealer and Primer Costs
Several factors influence the overall expense:
| Cost Factor | How It Affects the Project |
|---|---|
| Wall condition | Damaged surfaces require more preparation |
| Surface area | Larger areas require more materials and labour |
| Product formulation | Specialised products may cost more |
| Existing paint | Removal or sanding may be necessary |
| Moisture damage | Additional investigation and repairs may be required |
| Number of coats | More coats increase material and labour requirements |
| Accessibility | High or difficult surfaces can increase labour complexity |
How Wall Condition Influences Material and Labour Requirements
Consider two bedrooms of similar size.
The first has clean, sound paintwork and requires only a colour refresh.
The second has peeling paint, repaired patches, and visible moisture stains.
Although both rooms have similar dimensions, the second requires significantly more preparation.
Therefore, its overall painting cost may be higher.
Why Proper Surface Preparation Can Reduce Repainting Costs
Skipping necessary preparation may save money initially.
However, premature peeling, uneven coverage, or repeated repairs can increase expenses later.
For this reason, preparation should be evaluated as part of the complete painting system.
When Professional Wall Preparation Is Worth Considering
Professional assessment may be particularly useful when:
- Paint repeatedly peels.
- Water stains return.
- The surface remains powdery after cleaning.
- Different coatings have been applied previously.
- Large areas require repairs.
- The substrate is difficult to identify.
For larger projects, professional painting services in Singapore can help homeowners assess wall preparation requirements before repainting.
How to Choose Between Wall Sealer and Primer for Your Home
The correct choice begins with understanding the wall rather than selecting a product based only on its name.
Choose Based on Wall Condition
Different surface conditions require different preparation methods.
New, Porous, or Powdery Walls
For suitable new or porous masonry, consider a compatible wall sealer or masonry primer-sealer.
However, significant powdering must be addressed before coating.
Previously Painted or Repaired Walls
For sound existing paint, additional priming may not always be necessary.
However, repaired sections, major colour changes, or adhesion concerns may justify using a suitable primer.
Stained, Damp, or Peeling Walls
Identify and correct underlying problems first.
After completing the necessary repairs, choose a specialised primer or sealer where appropriate.
Choose Based on the Painting Project
Interior Wall Painting
For bedrooms and living rooms, consider surface compatibility, odour, ventilation, and the intended finishing paint.
Lower-odour water-based systems may be practical when suitable for the substrate.
Exterior Wall Painting
Exterior walls require products designed for weather exposure.
Consider moisture resistance, substrate condition, and compatibility with the complete exterior coating system.
Check Product Compatibility Before Making a Final Decision
Always examine the product’s technical information.
Important details include:
- Suitable substrates.
- Required preparation.
- Coverage.
- Application method.
- Drying and recoating conditions.
- Compatible finishing paints.
- Restrictions and limitations.
Questions to Ask Your Painting Contractor
Before approving a quotation, ask your contractor to explain the proposed preparation system.
What Is the Existing Wall Surface Made Of?
Determine whether the surface is plaster, cement render, concrete, or an existing painted coating.
Does the Wall Need Sealing, Priming, or Both?
Ask which problem the proposed coating is intended to solve.
Which Undercoat Is Compatible With the Selected Paint?
Request the product details and confirm that the recommended coating system is appropriate for your wall.
A transparent explanation can help you compare quotations more effectively.
Final Verdict: Wall Sealer or Primer – Which Should You Choose?
When comparing wall sealer vs primer in Singapore, there is no universally superior product.
A wall sealer is commonly selected for its ability to control porosity, prepare masonry surfaces, and provide specified resistance to alkalinity. Meanwhile, a primer may be chosen for adhesion, colour coverage, stain blocking, or other surface-preparation requirements.
However, many modern products combine these functions.
Therefore, the most important factors are the condition of your wall, the properties of the chosen coating, and its compatibility with the final paint.
For newly plastered HDB walls, an appropriate masonry sealer or primer-sealer may be recommended. For previously painted condominium interiors, a suitable primer may be useful when dealing with repairs or major colour changes.
On the other hand, walls affected by active dampness, severe peeling, or unstable plaster require corrective work before any coating is applied.
Ultimately, proper wall preparation is the foundation of a successful painting project.
By understanding your surface and choosing the appropriate products, you can achieve a more consistent finish while reducing the risk of avoidable painting problems.
Frequently Asked Questions About Wall Sealer vs Primer in Singapore
1. Is wall sealer the same as primer in Singapore?
Not exactly. Wall sealers commonly control porosity and prepare masonry surfaces, while primers improve adhesion and provide other preparation functions. However, many products combine both properties.
2. Do I need wall sealer before painting an HDB flat?
It depends on the wall condition. Newly plastered, porous, or alkaline masonry may benefit from an appropriate sealer. Previously painted walls may require different preparation.
3. Can I use primer instead of wall sealer?
Yes, if the selected primer is specifically designed to perform the required sealing function and is compatible with the wall and finishing paint.
4. Should I apply wall sealer before or after primer?
There is no universal sequence. Many coating systems require only one primer-sealer. If separate products are specified, follow the manufacturer’s recommended application order.
5. Can I paint directly over old paint without primer?
Sometimes. If the existing coating is clean, sound, compatible, and properly prepared, direct repainting may be suitable. However, damaged surfaces or major colour changes may require primer.
6. Is wall sealer necessary for newly plastered walls?
A suitable masonry sealer or primer-sealer is commonly recommended for new plaster. However, the plaster must first meet the curing, moisture, and preparation requirements of the coating system.
7. Does wall sealer prevent peeling paint?
A suitable sealer can help reduce certain adhesion-related problems. However, it cannot prevent peeling caused by active leaks, unstable plaster, incompatible coatings, or inadequate preparation.
8. Can primer or wall sealer stop mould on walls?
Ordinary primers and sealers cannot guarantee mould prevention. Some coatings resist fungal growth, but moisture control, adequate ventilation, and proper treatment remain essential.
9. How long should wall sealer or primer dry before painting?
Drying and recoating times depend on the specific product and environmental conditions. Always follow the manufacturer’s technical data sheet, particularly in Singapore’s humid climate.
10. Which is better for Singapore’s humid weather: wall sealer or primer?
Neither is automatically better. The correct product depends on the substrate, moisture condition, and finishing paint. Proper drying and preparation are more important than the product category alone.